
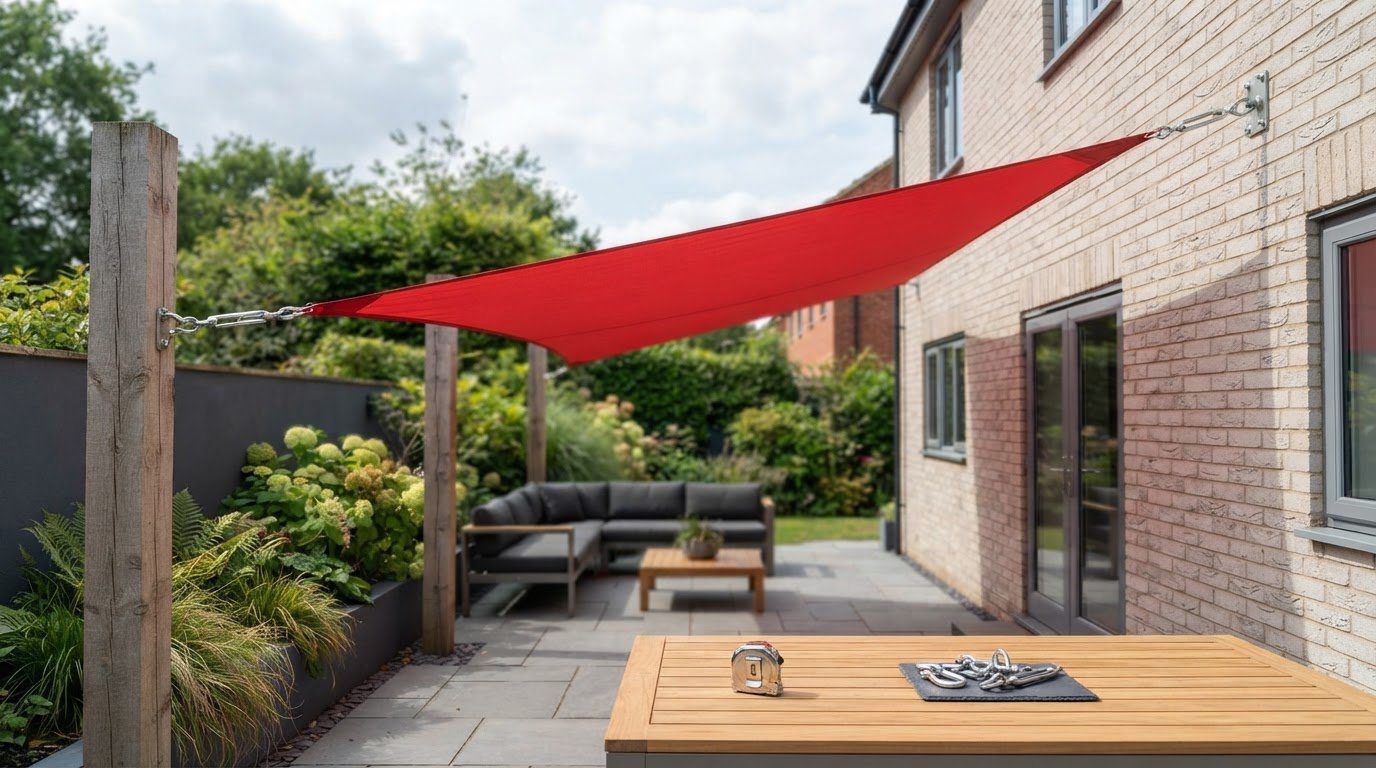
How to Choose and Align Sail Shade Fixing Points
The fixing points matter as much as the sail: choose structural supports, leave space between each corner and its anchor, and plan for tensioning hardware. Recommendations for the corner-to-fixing-point gap range from approximately 20 to 50 cm, while anchor plates may be positioned 35 cm to 100 cm from the sail corners. The sail should be smaller than the span between its anchors, so turnbuckles and other fittings have room to adjust the tension.
It’s easy to focus on a sail’s shape and overlook the alignment of its anchors. Careful positioning makes the layout practical, gives the hardware room to move and helps rainwater drain.
This guide covers how to choose and align sail shade fixing points and hardware, leave room between sail corners and anchor plates, and position turnbuckles, shackles and pads. It also explains how to assess supports and arrange the corners for a well-planned, evenly tensioned setup.
Key Takeaways
- Map the sail’s shape and intended height before choosing where each anchor will sit.
- Match turnbuckles, shackles and pad eyes to the connection they need to make.
- Keep corner connections compact so tension is easier to adjust and control.
- Assess the strength and position of potential supports before settling on a fixing layout.
How to Decide the Anchor Points for Your Shade Sail?
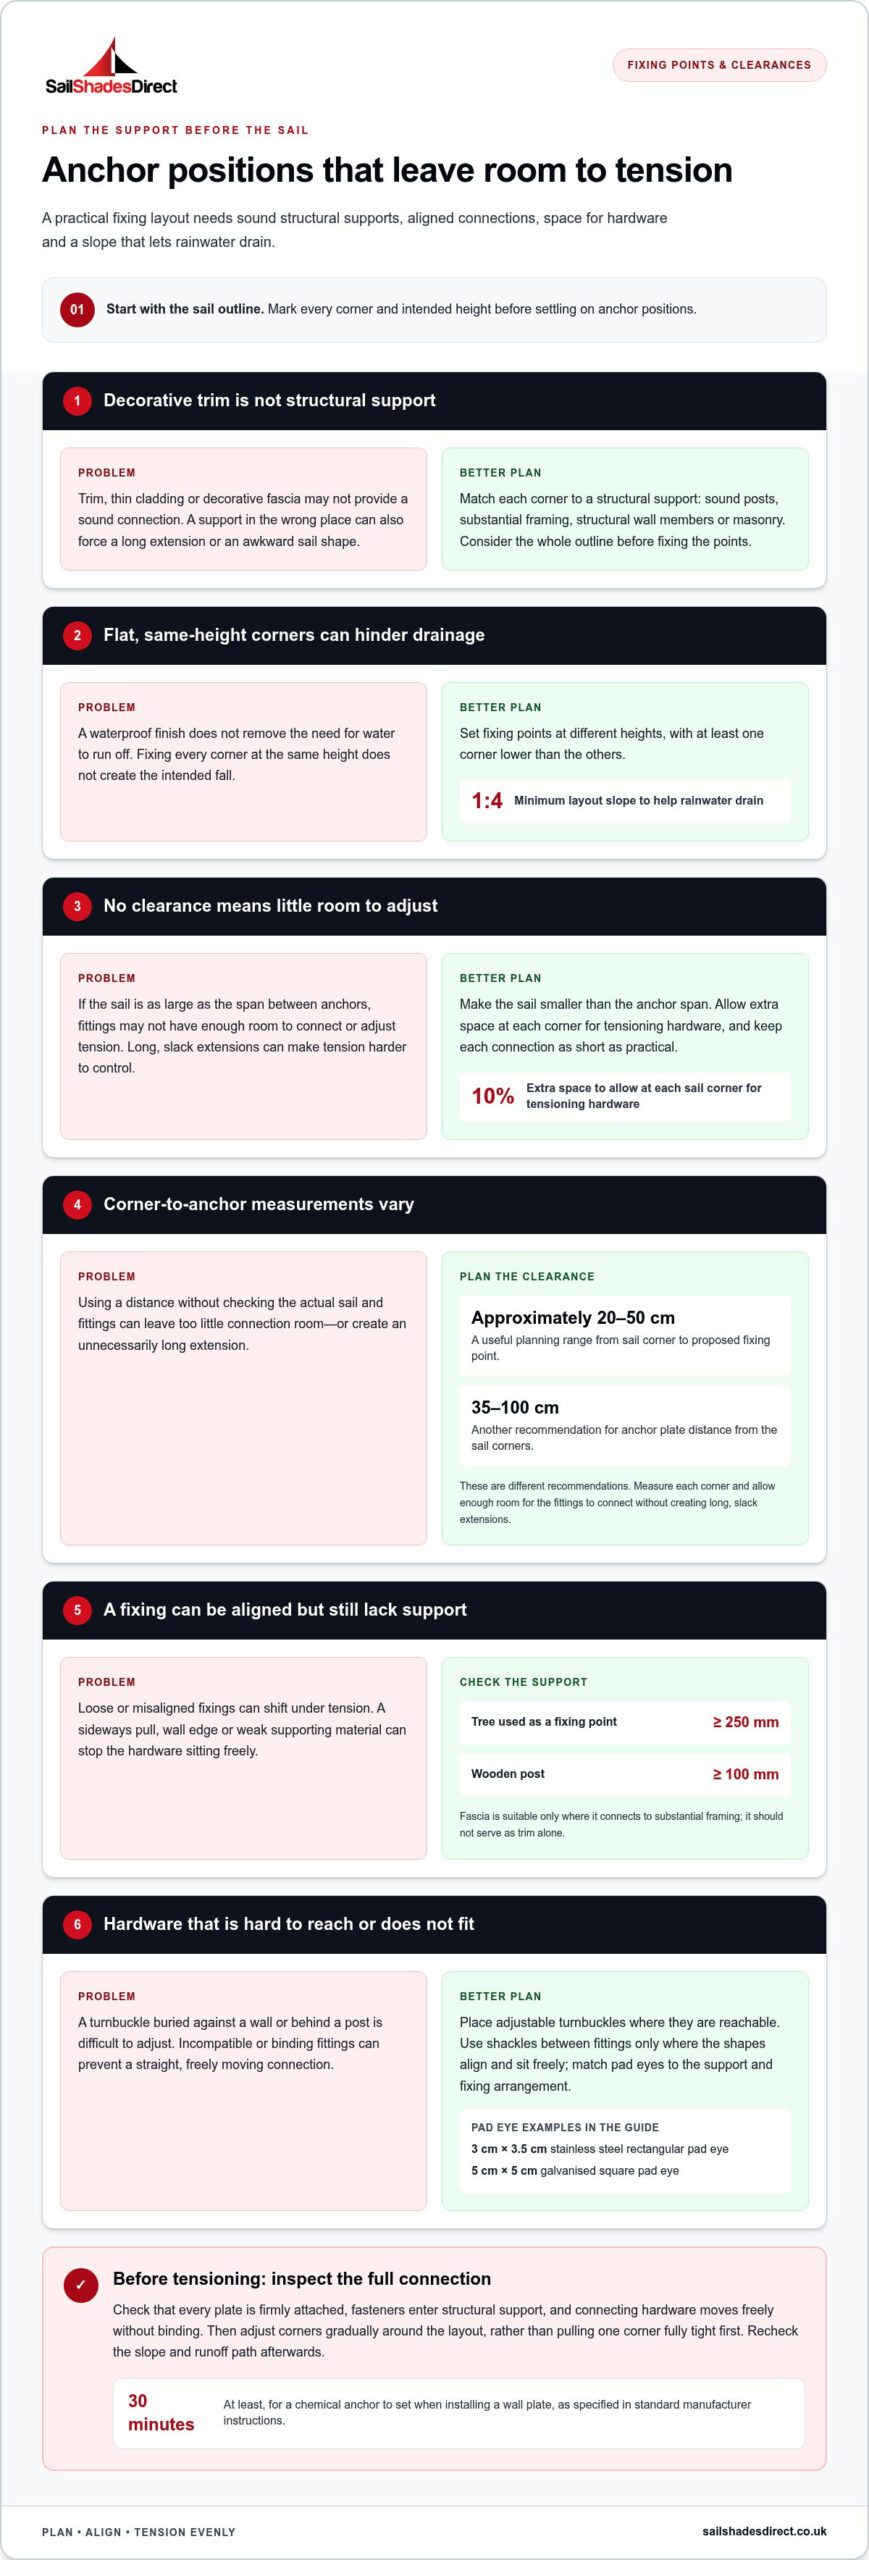
Use structural supports such as sound posts, substantial framing, structural wall members or masonry; avoid decorative trim. Set the fixing points at different heights to create a drainage slope, with a minimum layout slope of 1:4.
Identify suitable fixing points
Mark where each sail corner will connect, then assess the support at each point. A fixing must provide a sound connection as well as sit in the right place. Consider the layout as a whole: a support that requires a long extension or creates an awkward sail shape can make even tension difficult.
- Sketch the sail outline and mark every corner before choosing the anchors.
- Match each corner to a structural support, such as masonry or substantial framing.
- Leave decorative trim out of the plan; it is not a substitute for structural support.
Set fixing-point height and clearance
Choose the height of each anchor to create the intended slope and leave room for fittings. The sail needs a minimum slope of 1:4 to help rainwater drain. A waterproof finish does not replace this fall: water still needs a route off the fabric. Avoid placing every corner at the same height.
- Set at least one corner lower than the others to guide runoff.
- Allow an extra 10% of space at each sail corner for tensioning hardware.
- Compare the sail dimensions with the anchor span; the sail should be smaller, leaving room to fit and adjust the connections.
Once the anchors are in position, adjust the corners in turn to tension the sail evenly. Work gradually around the layout instead of pulling one corner fully tight first. This helps balance the fabric and reveals alignment problems before the connections are under full tension. After adjustment, check the slope and runoff path again.
Selecting and positioning turnbuckles, shackles and pads
Choose fittings according to their role in the corner connection, and check that the parts are compatible. A clear sequence makes it easier to attach the sail, adjust tension and inspect each connection.
-
Choose suitable tensioning hardware
First decide how each corner will connect and how you’ll adjust its tension. Turnbuckles allow adjustment, while hook-and-hook and claw-and-claw ends suit different connection points. Shackles join compatible fittings; carabiners or snap hooks allow quick attachment. Rope can provide a simple link, while a pulley system or chain may suit a different connection arrangement. Avoid accessories that serve no clear purpose.
-
Position turnbuckles, shackles and pads
Place the adjustable turnbuckle where you can reach it to tension the sail, rather than burying it against a wall or behind a post. Connect the shackle between fittings only where their shapes align and sit freely. Choose a pad eye that matches the fixing arrangement: examples include a 3 cm x 3.5 cm stainless steel rectangular pad eye and a 5 cm x 5 cm galvanised square pad eye. Attach each pad eye to the support as designed.
-
Fit snap hooks and turnbuckles
Lay out the complete fixing kit beside the sail before connecting it. A three-corner stainless steel kit uses a different corner count from a four-corner rectangular or square kit, so match the kit to the sail shape. Check that each snap hook closes properly and that turnbuckles have room for adjustment. For example, a Grade 316 stainless steel turnbuckle may have claw-and-claw ends, while another has hook-and-hook ends. Follow the connection sequence consistently at every corner.
Planning a bespoke sail layout? Explore bespoke sail shades as a next step for shaping the overall solution.
Distance between sail corners and anchor plates
Leave enough room to connect each sail corner to its anchor plate. Wind puts changing forces on the fabric, fixings and supports, so attach anchors to structural material rather than decorative trim. Loose or misaligned fixings can shift under tension.
- Measure from each sail corner to its proposed fixing point before installing plates. A useful planning range is approximately 20 to 50 cm; another recommendation places anchor plates 35 cm to 100 cm from the corners. These ranges differ, so allow enough room for the fittings to connect without creating long, slack extensions.
- Choose wall plates for sound masonry or structural wall members, not thin cladding or decorative fascia. Mark the plate position and align its holes with the intended connection. Standard manufacturer instructions specify allowing a chemical anchor to set for at least 30 minutes when installing a wall plate.
- Assess each anchor option against its supporting material. A tree used as a fixing point should have a diameter of at least 250 mm; a wooden post should have a minimum diameter of 100 mm. Fascia can be considered only where it connects to substantial framing, rather than serving as trim alone.
- Keep each corner connection as short as practical. Long chains, ropes or extensions can increase movement and make tension harder to control. For a square sail, match each plate to its corresponding corner before drilling. A misplaced anchor can pull the fabric out of line or prevent the hardware from fitting properly.
- Inspect the entire installation before tensioning. Check that each plate is firmly attached, its fasteners enter structural support and the connecting hardware moves freely without binding. Avoid anchor positions that make the sail pull sideways across a plate or prevent a straight connection because of a wall edge.
Fixings and supports carry changing forces from the sail, so attach them to structural material and keep connections aligned and secure. Poor support, loose hardware or sideways pulls can cause movement, strain or uneven tension. Inspect the whole setup before tensioning.
Choosing and aligning sail shade fixing points
Planning or building requirements can depend on the site, property and proposed work. Consider these factors before installation, particularly for permanent posts and foundations.
- Sketch every corner and support before settling on the alignment. Include the sail’s shape, nearby walls and posts, and the intended direction of rainwater runoff. For a square or rectangular sail, position opposite diagonal corners high and the other pair low. This twisted layout can help water drain and distribute tension across the fabric.
- Match each support arrangement to its foundation and surface. A dedicated shade sail pole plinth should measure 600 x 600 x 600 mm or larger. A reinforced concrete surface used for pole fixing should be at least 15 cm thick. These details affect where a post can stand, so mark the planned base before finalising the sail corners.
- Wind transfers force from the sail through its corners and fixings to each support. A misaligned anchor can pull sideways, strain a connection or create uneven tension. Check that posts, plates and corner fittings form a direct load path, and don’t rely on decorative features for support. Before tensioning, inspect each connection for looseness.
- Review the layout from different positions before fixing anything permanently. Check that the fabric clears doors, windows and walking routes, and that rainwater can drain without pooling in a low section. Match each corner to its anchor, then revise the plan if a post or wall plate creates an awkward angle. Aim for a coherent layout, not simply the shortest distance between supports.
UK planning or building requirements may depend on the site, property and proposed work. Check them before installation, particularly when permanent posts or foundations are involved.
Sail Shades Direct: Bespoke Sail Shades
Sail Shades Direct designs, manufactures and installs bespoke sail shades for outdoor spaces. If your layout involves unusual dimensions, existing structures or a specific drainage direction, a tailored sail can bring the fabric and anchor positions together in one plan.
Share the shape of your space and how you want to use shade to discuss a suitable solution. Depending on the space, options include bespoke sail shades, rolling sun sails, arm awnings and giant umbrellas.
Contact Sail Shades Direct to discuss a bespoke sail shade for your space.
Shape your outdoor plan
Before work begins, turn your outline into a plan for the site. Note how you use the space, where shade matters most and which existing features affect the layout. This gives the design process a clear starting point and keeps appearance, access and installation in view.
Plan sail shade fixing points and hardware as part of the whole outdoor setting, not as a separate fitting task. The finished arrangement should complement the building and garden while supporting how you want to use the space. A considered plan helps turn initial ideas into a purposeful shading solution.
To discuss how your space could suit a bespoke design, contact Sail Shades Direct. Take the next step with a clear picture of your setting and the result you want.
Frequently Asked Questions
Where to install a shade sail?
Install a shade sail where suitable structural supports can hold its corners and the fabric can shade the intended outdoor area. First map the patio or seating space, then identify possible wall or post positions around its perimeter. Consider doors, windows, access routes and rainwater drainage. Don’t rely on decorative trim or choose anchor positions that obstruct everyday movement.
How far apart should shade sail fixing points be?
Set the anchors to match the sail’s span while leaving room for corner connections. Planning guidance gives approximately 20 to 50 cm between a sail corner and its fixing point; another recommendation places anchor plates 35 cm to 100 cm from corners. Plan sail shade fixing points and hardware together, measuring the proposed span against the sail dimensions and available adjustment before marking positions.
What hardware is needed to install a shade sail?
Sail shade fixing points and hardware typically include an anchor at each corner, compatible connectors and a way to adjust tension. Depending on the supports, fittings might include pad eyes, turnbuckles, shackles, snap hooks or rope. A triangular sail needs a three-corner layout; a square or rectangular sail needs four. Plan the connection sequence so each fitting matches the next and can move freely during adjustment.
Which shade sail fixings suit brick, timber, or concrete?
Choose fixings for the supporting material, not just the sail’s corner fitting. Brick should be sound masonry; timber needs a substantial structural member rather than decorative boarding. For a reinforced concrete surface used to fix a pole, the specified minimum thickness is 15 cm. A dedicated pole plinth should measure at least 600 x 600 x 600 mm. The anchor’s position and load path matter alongside the material.
How do you install shade sail wall plates and posts?
For a wall plate, position it on structural masonry, align the connection with the sail corner, and install its anchors according to the fixing system. Chemical anchors need at least 30 minutes to set before the plate is loaded. For a post, prepare a suitable base, then align the post with the planned corner. Check the finished position against the sail layout before attaching fabric or applying tension.
How do you tension a shade sail and allow for its corner hardware?
Leave extra space at each corner for tensioning fittings, and make the sail smaller than the anchor span so adjustment remains possible. A planning allowance is an extra 10% at each corner. Fit the turnbuckles or other connectors, then tighten gradually around the sail rather than pulling one corner fully tight first. Keep a slope of at least 1:4 so rainwater can drain instead of collecting on the fabric.