
How to Fix a Shade Sail That Sags After Rain
A shade sail that sags after rain usually needs balanced tension across its corners and a slope that lets water drain away. If you’re asking why my DIY shade sail is sagging, first check for loose fixings, uneven tension or a low spot where rainwater can collect.
The fabric may not be the only problem. Pooling water can stretch it, while loose or poorly secured fixing points can make the whole sail droop. Tightening one corner fully before adjusting the others can also leave the tension uneven.
This guide explains how to adjust the corners in small, even passes, check for lasting damage from pooling and inspect the fixing points. It also covers how the sail’s slope, the weather and the sun’s changing angle can affect its fit and performance.
Key Takeaways
- Allow space for tensioning hardware when measuring between fixing points, so the sail can be tightened without forcing the fabric.
- Secure mounts into sound structure and look for movement or weakness at each fixing point.
- Match the sail’s slope and fabric to rain conditions, and consider how sun direction and wind affect its position.
- Trace sagging to its cause, whether it’s water pooling, uneven tension, an oversized sail or changes in temperature.
Can you fix a shade sail that stretched from water pooling?
You can often improve a sagging sail by removing pooled water and adjusting its fit. Work through the steps carefully: a deep, permanent pocket may not flatten through tensioning alone.
-
Measure Between the Fixing Points
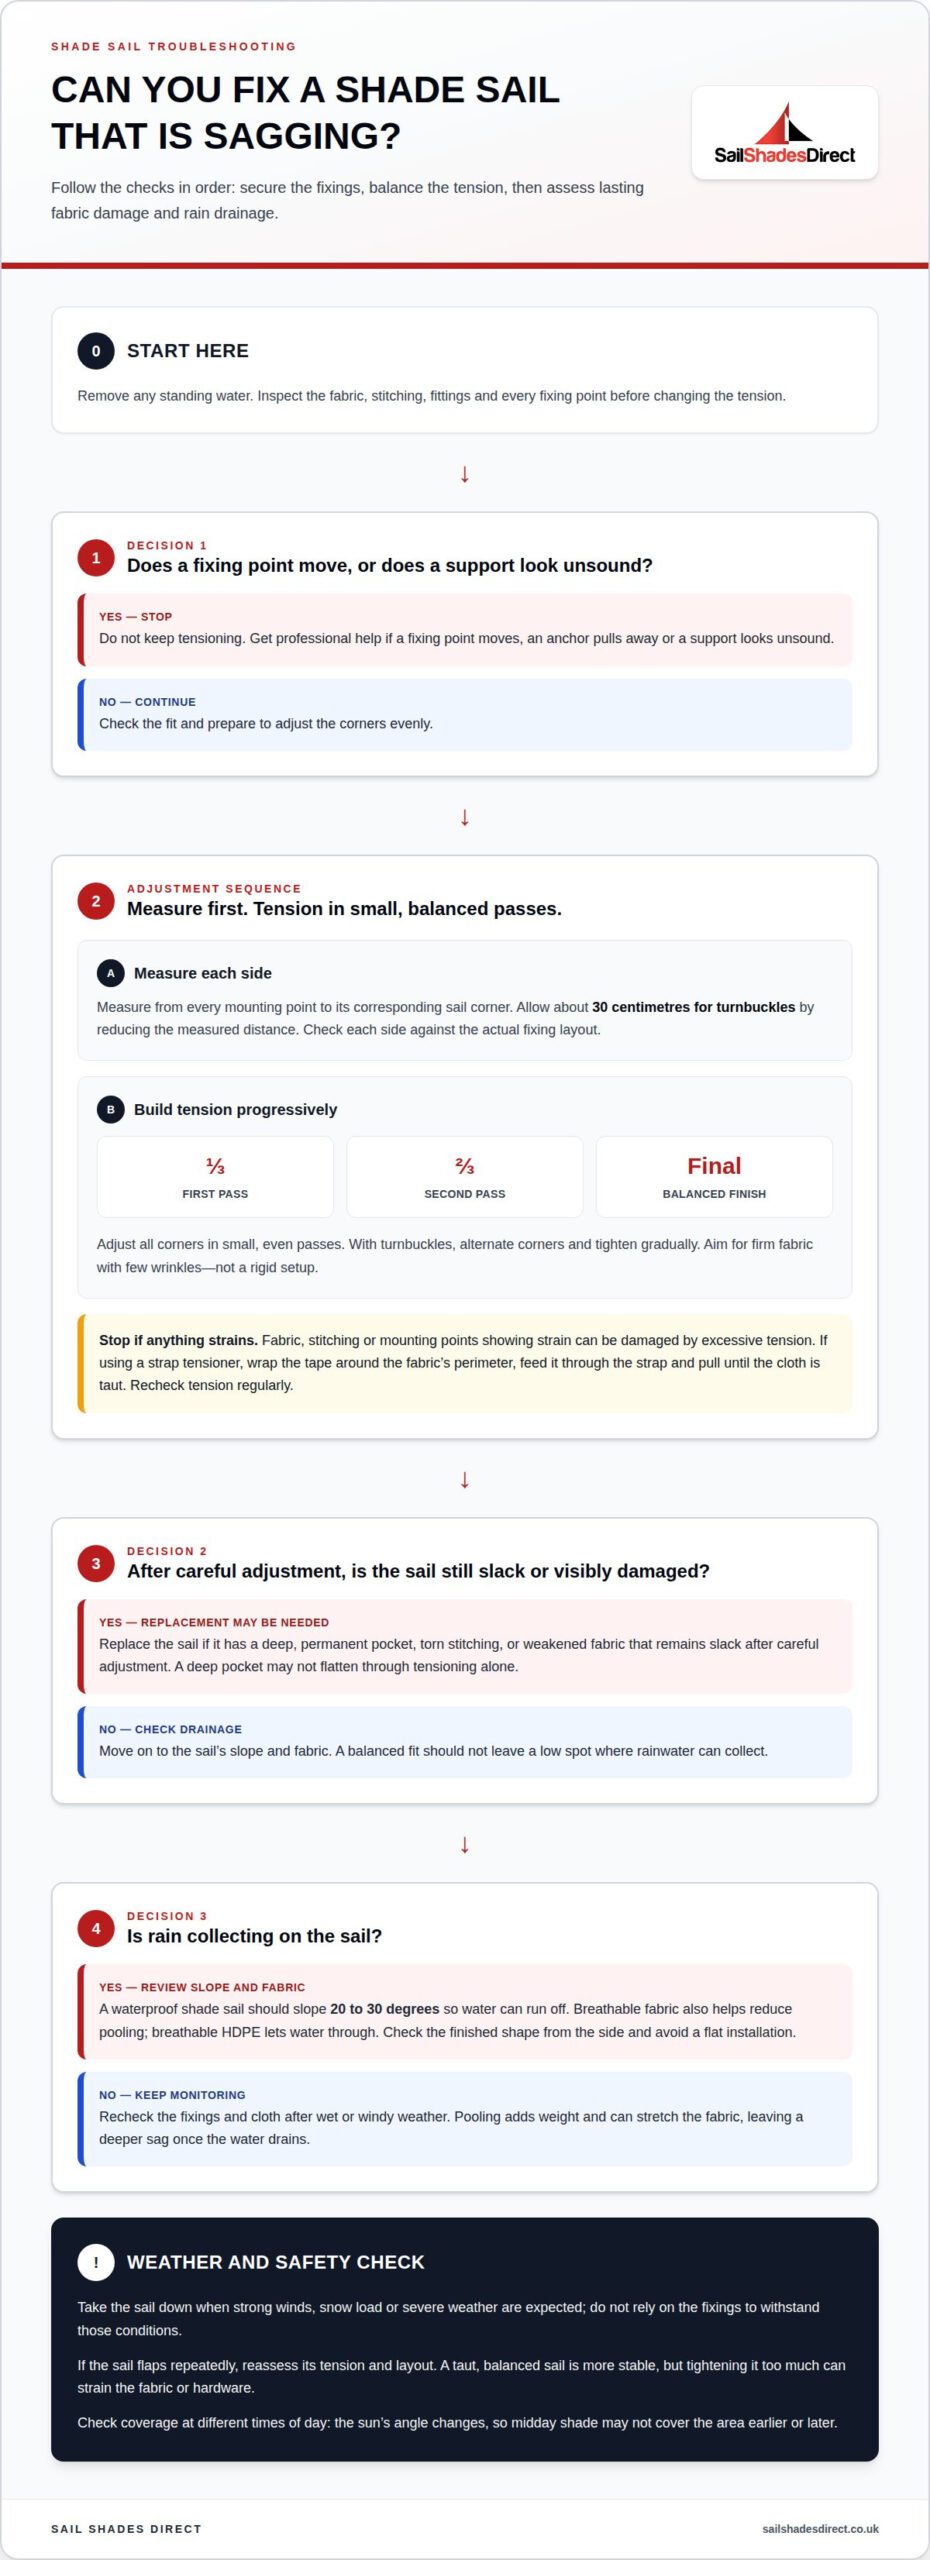
Measure from each mounting point to its corresponding sail corner before changing the tension. Allow about 30 centimetres for turnbuckles by reducing the measured distance, so there’s room to connect and adjust the hardware. Check every side rather than assuming a square space; a custom sail needs measurements that match the actual fixing layout.
-
Tension the Sail Evenly
Adjust every corner in small, even passes instead of pulling one fully tight first. Bring the sail to roughly one-third tension, then two-thirds, before making the final adjustment. This spreads the load and helps reduce a central dip where rainwater could collect. Aim for firm fabric with few wrinkles, not a rigid setup that strains the fittings.
-
Tighten the Sail with Hardware
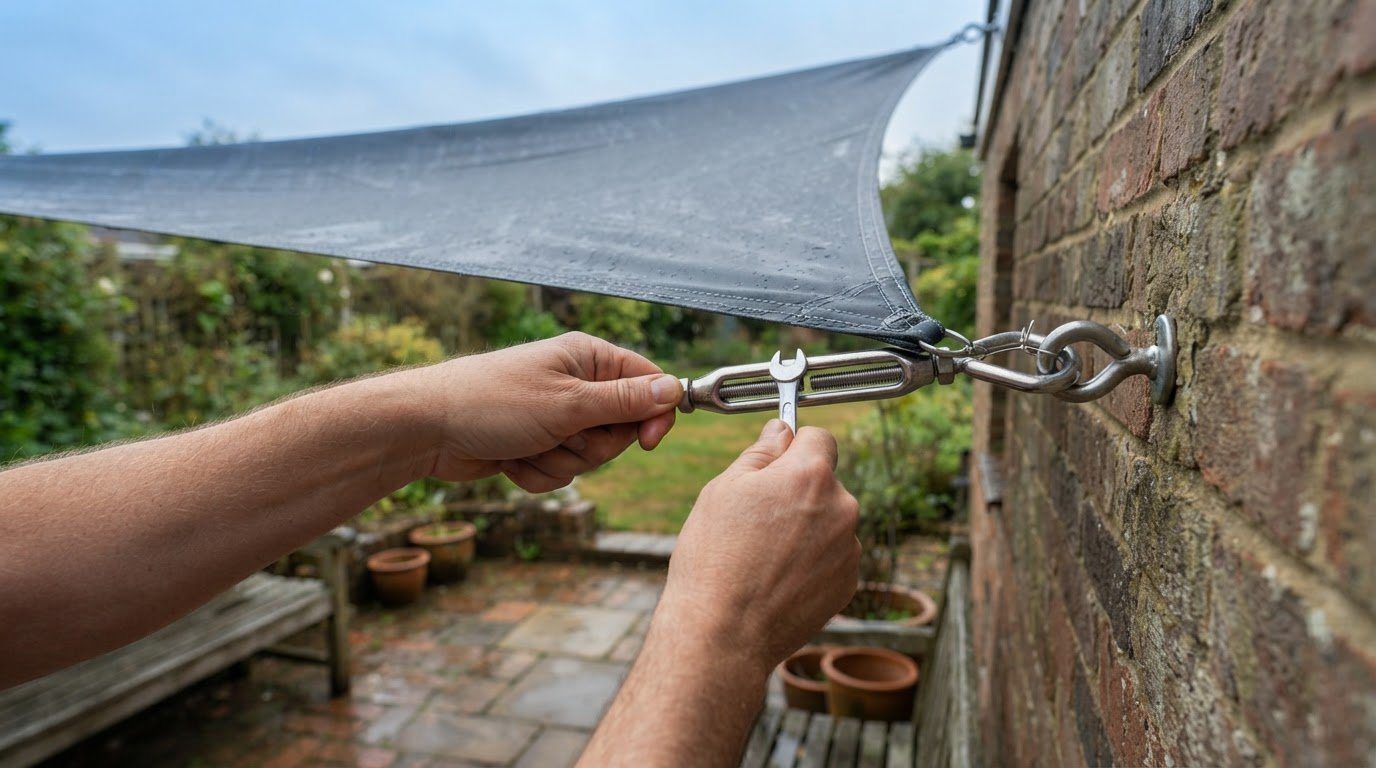
If the sail feels loose, tighten its turnbuckles gradually, alternating between corners to balance the pull. Stop if the fabric, stitching or mounting points show strain: excessive tension can damage the cloth and hardware. With a strap tensioner, wrap the tape around the fabric’s perimeter, feed it through the strap and pull until the cloth is taut. Recheck the tension regularly.
-
Consider Replacement or Professional Help
After removing standing water, inspect the fabric and fittings. Replace the sail if it has a deep, permanent pocket, torn stitching or weakened fabric that remains slack after careful adjustment. Get professional help if a fixing point moves, a support looks unsound or you can’t tension the sail without straining its hardware.
UK planning requirements can depend on the sail’s size, position and property restrictions, so don’t assume a large or fixed installation is exempt. Building-control considerations may also depend on the supporting structure and mounting method. Ask your local council about requirements for your site.
Proper installation and secure fixing points
Before adjusting the tension, check that the sail has stable support. Sound mounting and well-positioned anchors help prevent movement that can cause the middle to sag.
-
Plan Strong Mounting Points
Choose each fixing point based on the structure behind it, not just the most convenient surface. Fix mounts into sound structure, not trim or weak surface boards. Check the full load path from the sail corner, through the fixing, and into the supporting wall or post. If a surface flexes or feels loose, don’t use it as an anchor.
Plan the anchor layout before drilling, taking the sail’s shape and pull direction into account. A fixing too close to a weak edge may move under tension or exposure to the weather. Mark the proposed points and check that each allows a direct, secure connection without relying on decorative boards or loose fittings.
-
Position the Anchor Points
Match each anchor position to its sail corner, keeping the lines of pull clear. A large square sail attached at four corners needs balanced support. Poorly aligned points can pull the fabric unevenly and encourage a central dip. Check that nearby walls, branches and other obstacles won’t rub against the cloth.
Consider the height of each fixing point before installation. Different heights can create a useful slope, while unsuitable heights may leave rainwater trapped. Mark the positions and picture the finished sail from below, checking its coverage and clearance before installing the mounts.
-
Check Posts and Anchors
Inspect every support post and anchor before tensioning. Look for movement at the base, loose fixings, cracked surrounding material or a wall mount that shifts when gently tested. A post that leans under load can change the sail’s shape, even if its corner hardware stays attached.
After installation, recheck the fixing points following windy or wet weather, and watch for fresh movement or wear. Stop adjusting if an anchor starts pulling away or a post becomes unstable. For help planning secure mounting around your outdoor space, explore sail shade installation planning.
Accounting for sun angles, wind, and rain
For rain drainage, give the sail a slope rather than leaving it level. A waterproof shade sail should slope 20 to 30 degrees so water can run off; breathable fabric also helps reduce pooling.
- Set the slope to suit the fabric. Water can sit on a waterproof sail until it drains, so it needs a steeper fall than breathable fabric. Check the finished shape from the side: a level square sail can form a low spot, while lowering one corner helps direct water away. Avoid a flat installation where rain can collect.
- Check sun coverage at different times of day. The sun’s angle changes, so a sail that shades a patio at midday may leave it exposed earlier or later. Observe the area during the hours you use it, then position the sail and anchors to cover it without creating a dip that traps water.
- Check for movement in the wind after installation. A loose sail can flap, rubbing against fittings and wearing the fabric over time. Inspect the anchors and cloth after windy weather. If the sail flaps repeatedly, reassess its tension and layout. A taut, balanced sail is more stable, but don’t tighten it so much that the fabric or hardware strains.
- Plan for rain and changing weather, not just a dry day. Pooling water adds weight and can stretch the fabric, leaving a deeper sag after the water drains. Breathable HDPE fabric lets water through and can reduce pooling. Take the sail down when strong winds, snow load or severe weather are expected, rather than relying on the fixings to withstand those conditions.
Common causes of shade sail sagging
If you’re asking why my DIY shade sail is sagging, trace what has changed before tightening anything. The shape of the dip, the fabric and the fixing layout can help show whether the cause is a poor fit, uneven support or lasting stretch.
- Compare the sail’s dimensions with the space and anchor layout. An oversized sail can be difficult to install and may look loose even when its corners are attached. Check whether the cloth extends beyond the practical reach of the fixing points. Pulling harder won’t correct a poor fit and may strain the fabric or hardware.
- Check the middle of a large square sail and count its supports. A large square shade sail with only four anchor points is more likely to sag centrally. The unsupported span can dip between corners, particularly if the sail’s shape or mounting makes it difficult to keep the fabric evenly supported. Note whether the dip follows one edge or sits in the centre.
- Consider how exposure affects the sail’s tension. Wind, sun exposure and temperature changes can all affect it. If the fabric looks different after hot or windy weather, compare its current shape with how it looked before. Changes at several corners suggest a broader fit or exposure issue rather than one loose fixing.
- Look for a permanent pocket, not just temporary slack. Rainwater collects in low spots, adding weight and potentially stretching the fabric further. Breathable fabric helps water drain through, but better geometry alone usually won’t flatten a deep, lasting pocket. If the dip remains when the fabric is dry, extra tightening may not restore its original shape. This distinction helps answer why my DIY shade sail is sagging without confusing lasting damage with a simple adjustment.
- Match the cause to the next step: correct an oversized fit, review a four-corner layout, or assess fabric that stays pocketed. If you’re still considering why my DIY shade sail is sagging after these checks, a shade designed around your space may suit better. Explore a bespoke shade sail.
Sail Shades Direct: Bespoke Sail Shades
Sail Shades Direct can help if repeated adjustments haven’t resolved the sag or the layout needs rethinking. Its bespoke sail shades are designed for outdoor spaces, with design, fabrication and installation tailored to the project. This lets you consider the sail’s fit, fixing arrangement and intended coverage together, rather than treating each symptom separately.
If you’re considering a different setup, Rolling Sun Sails are another option for outdoor shade. The right choice depends on the space and how you want to use it; a sail may not suit every layout. For a tailored next step, contact Sail Shades Direct to discuss your outdoor shade requirements.
Choose shade that suits how you use your space
Use the repair as a chance to consider what you need from your outdoor space next season. A seating area used throughout the day may need a different approach from a spot used only for afternoon meals. If you’re still wondering why your DIY shade sail keeps sagging, consider whether the original design suits the space rather than simply adjusting it again.
Sail Shades Direct offers Bespoke Sail Shades, Rolling Sun Sails and Arm Awnings, giving you options to consider for different outdoor settings. The right direction starts with the space and how you want to use it. Contact Sail Shades Direct for advice and take a considered next step towards comfortable, dependable shade.
Frequently Asked Questions
Quick answer: how do you fix a sagging shade sail?
Remove standing water, inspect the cloth and fixings, then adjust the corners gradually. First check whether a corner or support has shifted: pulling every corner tighter won’t correct a loose anchor. After adjusting, look at the sail from below and from the side. If a deep pocket remains when the fabric is dry, more tension may not restore its shape.
Should a shade sail be tight like a drum?
No. A shade sail should feel firm, but not rigid like a drum. Over-tightening can strain the fabric, stitching and fittings, so stop if any part looks distorted or under excessive pull. Slight movement in a breeze is different from persistent flapping or deep wrinkles. Those signs suggest an imbalance that needs attention, not harder tightening.
Why is my shade sail sagging in the middle?
A central dip often forms when the sail has too little tension, a low point or too much unsupported fabric between its fixings. A square sail spanning a broad area can dip even when its corners remain attached. Rain adds weight to the dip and may stretch the cloth further. Check whether the sag is local or spread across the whole sail to narrow down the cause.
How tight should a shade sail be installed?
Make the sail taut and mostly wrinkle-free without forcing the fabric or hardware into a rigid position. There isn’t one tension setting for every sail: the cloth, span and mounting arrangement all affect the pull. Stop tightening if anchors shift, fittings distort or seams appear strained. A sail that stays stable without excessive force is better adjusted than one pulled to its limit.
How do I measure and tension a shade sail correctly?
Measure each distance from a fixing point to its sail corner and record the results before installation. Account for the fittings’ working length, then compare opposite sides to spot mismatches. When tensioning, make small adjustments around the sail instead of completing one corner first. For example, if one side develops deep wrinkles, ease that corner and rebalance the others before making another pass.
What turnbuckles, tensioners and fixings are suitable for a DIY shade sail?
Use fittings designed for shade-sail tensioning, such as a stainless-steel kit with turnbuckles, carabiners and wall anchors. Turnbuckles allow corner adjustments, while a strap tensioner can help pull the cloth perimeter taut. Choose fixings to suit the supporting structure, not just the sail. A wall anchor in weak trim won’t provide sound support, however suitable the other hardware may be.