
How to Retension a Shade Sail and Fix Common Sagging
Retension a sagging shade sail gradually and evenly across its corners, rather than pulling it tight from one point. First check the fabric, stitching and attachment points for damage. If a tension hook cannot reach the sail, a length of chain can bridge the gap. These checks are a practical starting point for how to retension a shade sail without putting unnecessary strain on it.
Pulling harder may seem like the obvious fix for a loose or flapping sail, but too much tension can cause problems too. Pooling water is another issue to address: the sail needs a suitable slope for rain to drain, as well as balanced tension at its fixing points.
This guide covers how to check for damage, address sagging and pooling, and choose an attachment kit for a square or rectangular sail. It also explains when chain can help if a tension hook falls short, and why worn or damaged fabric needs attention before you adjust the tension.
Key Takeaways
- Choose an attachment kit with stainless steel hardware, including turnbuckles, carabiner hooks and suitable fixing plates or anchor bolts.
- Before adjusting tension, look for corrosion or wear in the fittings and address damage that could affect the sail’s security.
- For a sail left out in the rain, plan a slope that helps water drain rather than collect in the fabric.
- Fix wall attachments to structural material, such as brick or studs, rather than relying on exterior cladding.
Adding chain when tension hooks do not provide enough reach
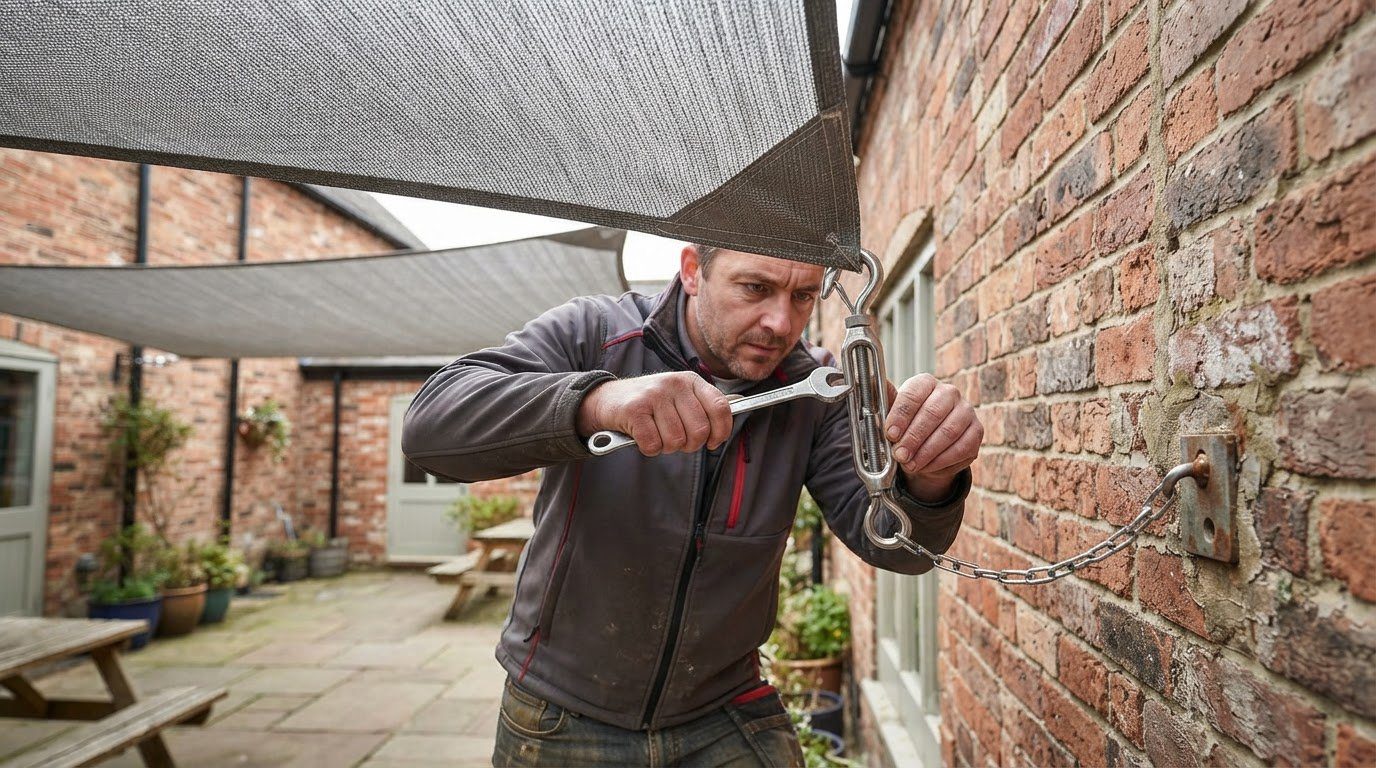
Start by checking the attachments. If a tension hook cannot reach, add chain, then tighten each corner gradually and evenly. You’ll need a suitable spanner for turnbuckles, and chain or a strap tensioner if the existing fittings cannot bridge the gap.
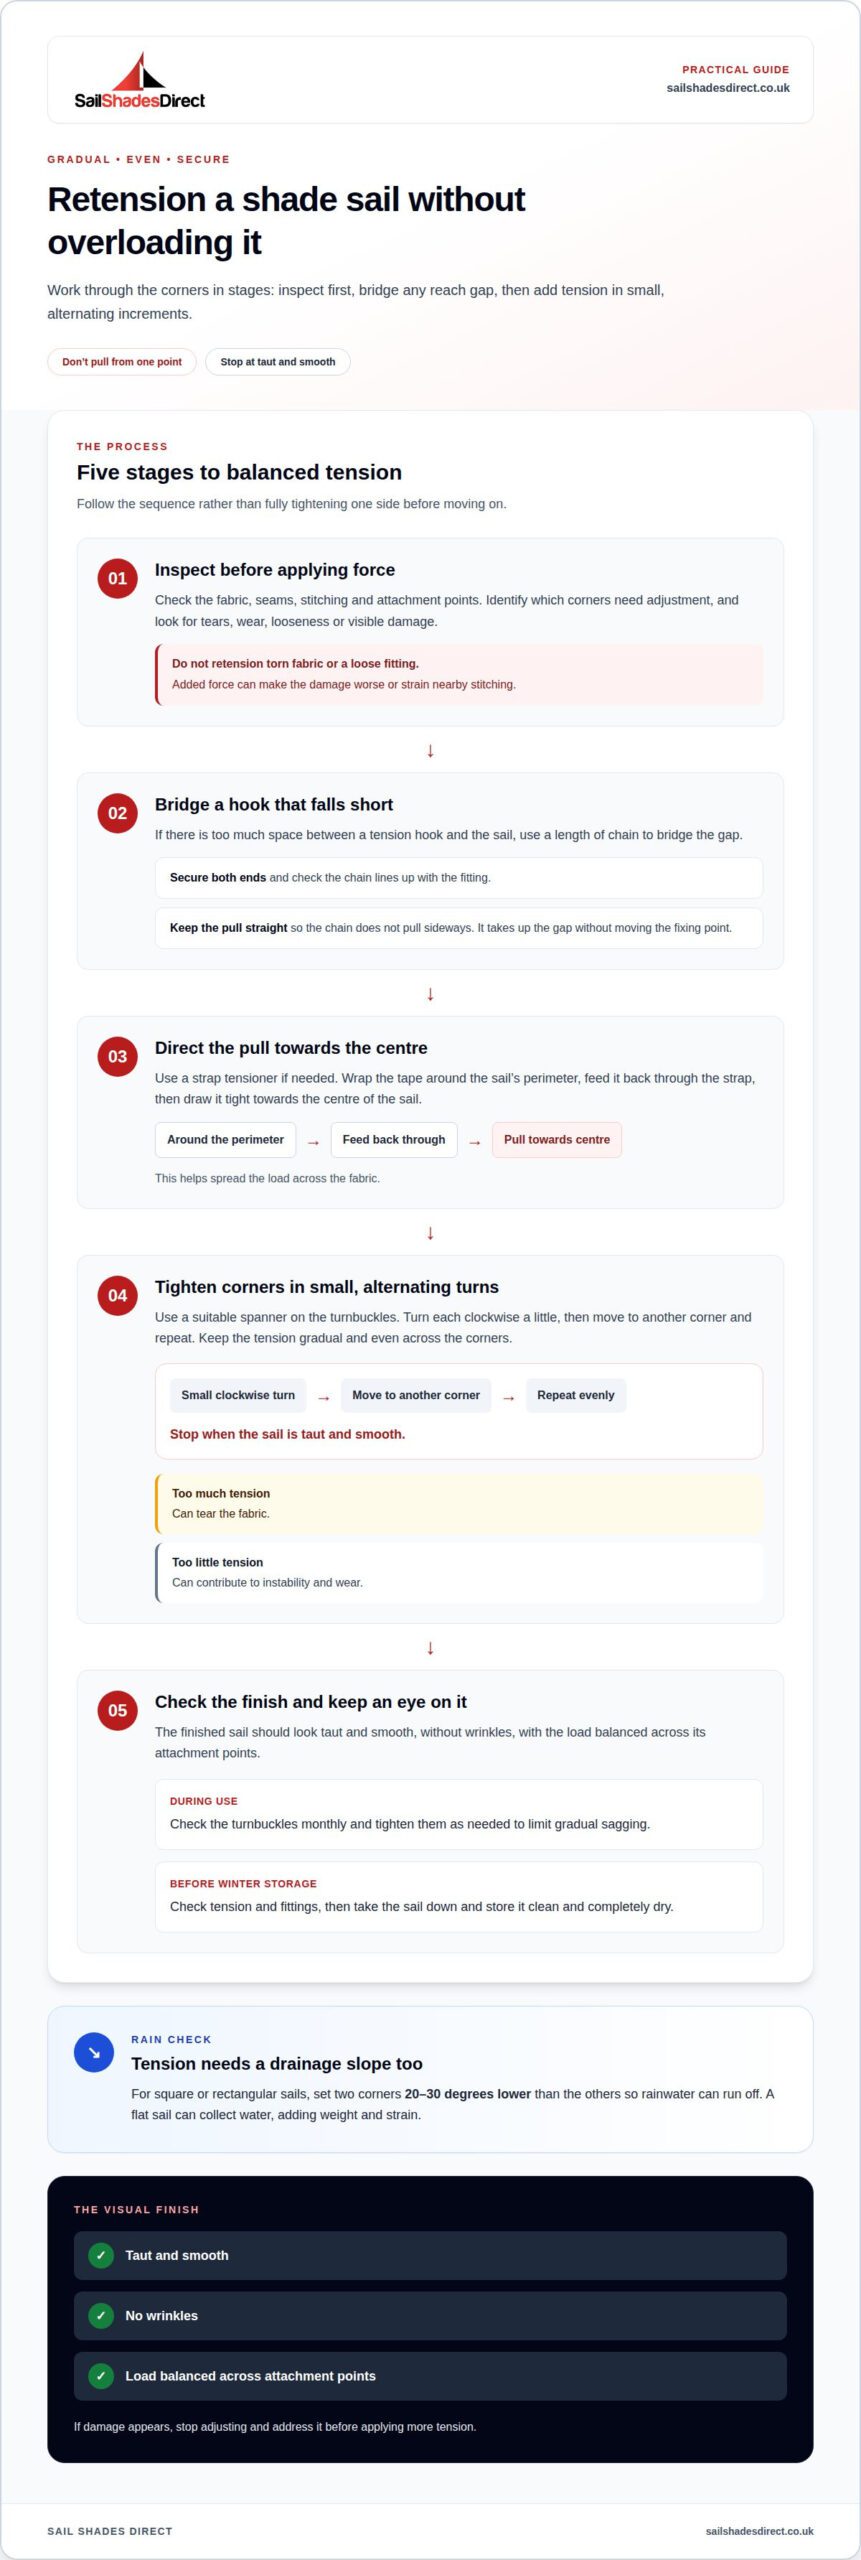
- Inspect the sail and its fittings before applying force. Check the fabric, seams and attachment points for damage, then identify which corners need adjustment. Don’t pull on torn fabric or a loose fitting, as added tension can make the damage worse.
- If there’s too much space between the tension hook and sail, bridge the gap with chain. Secure it at both ends and check that it lines up with the fitting rather than pulling sideways. This takes up the extra space without moving the fixing point.
- Use a strap tensioner to pull the sail taut. Wrap the tape around the sail’s perimeter and feed it back through the strap, then draw it tight. Direct the pull towards the centre of the sail to spread the load across the fabric.
- Tighten the turnbuckles in small, alternating increments across the corners. Turn each clockwise with a spanner, then move to another corner instead of fully tightening one side first. Stop when the sail is taut and smooth. Over-tightening can tear the fabric, while insufficient tension can contribute to instability and wear.
- Before storing the sail for winter, check its tension and fittings, then take it down and store it clean and completely dry. While it is in use, check the turnbuckles monthly and tighten them as needed to limit gradual sagging. You can adjust the tension without moving fixing points by turning the turnbuckles or adding chain where a hook falls short.
Use the finished sail as a visual check. A properly tensioned shade sail should be taut and smooth, without wrinkles, with the load balanced across its attachment points. Directing tension towards the centre of the sail can help distribute the pull.
Checking sail, stitching and attachment points for damage
Before adjusting tension, inspect the fabric, seams and fixings, then measure the distance between mounting points. These checks help distinguish a loose sail from one that needs repair or a different size.
-
Inspect the sail and stitching
Lay the sail out so you can see its full surface, then look for tears, holes, worn areas and damaged stitching. Check each seam and corner closely: even a small split can widen under tension. Pay particular attention to fabric exposed to repeated freeze-thaw conditions, which can weaken it over time. Don’t retension a damaged section, as added force may worsen a tear or strain nearby stitching.
-
Check the attachment points
Check every D ring, eyelet, fixing and connection for looseness, corrosion or visible damage. Inspect the supporting points too, especially where the sail connects to a wall. Wall fixings should attach to structural material such as brick or studs, not just exterior cladding. On a balcony, secure the sail carefully because wind can exert considerable force; one attachment point should be fixed to a wall.
- Measure between the mounting points before choosing a replacement sail or changing its position. For fixing points 300 × 300 cm apart, the recommended maximum sail size is 275 × 275 cm. Subtract 25 cm from each mounting-point dimension when calculating the sail size. For sails under 4 m, allow tensioning space of up to 10% of the sail length between each D ring and fixing point. Include room for the fixtures, rather than measuring only the fabric span.
- Measure each side and corner, then compare those measurements with the sail’s dimensions and the available hardware. A mismatch can leave too little space to connect and tension the sail, or create excess slack. If the fabric, stitching or attachment points are damaged, address that before applying tension. For a new installation, accurate measurements help determine whether the existing fixing points suit the sail’s size and shape.
Using attachment kits for square and rectangular sails
Choose stainless steel attachment hardware suited to the sail’s shape and fixing points. Fit the parts in sequence, keeping the tension balanced and allowing rainwater to drain.
- Match the kit to the mounting-point spacing before installation. For fixing points 400 × 400 cm apart, the recommended maximum square sail size is 300 × 300 cm. Leave room at each attachment for connection and tensioning, rather than choosing fabric that fills the entire span.
- Use stainless steel turnbuckles, carabiner hooks and wall plates or anchor bolts. Set each turnbuckle about half extended at the outset so there is room to adjust in either direction. Connect the sail securely, then tighten gradually and evenly across all corners. Don’t fully tighten one corner before moving to the next.
- For triangular shade sails, connect all three attachment points and tension each corner progressively. Keep the fixing hardware aligned with the direction of pull, so the fittings load evenly. If the triangle will face rain, arrange at least one corner 20-30 degrees lower than the others to guide runoff.
- Allow rainwater to escape from square and rectangular sails by setting two corners 20-30 degrees lower than the others. A sail left flat can collect water, adding weight and strain. If the sail is intended for sun shade only, consider how its position serves that use; don’t assume a flat arrangement will drain rain.
- Remove the sail during snowfall or prolonged rain, and take it down during storms at wind force 7 or higher. Shade sails aren’t generally designed for heavy snow loads; accumulated snow can strain the fabric, attachment points and supports. Loosening alone isn’t a substitute for removal in these conditions.
- For a garden installation, check after fitting that all fixing points remain secure and the sail sits taut without pulling unevenly. Recheck the turnbuckles and connections after adjustment, then confirm that the lower corners still allow rainwater to drain.
Recognising sagging, flapping and water pooling
Check the sail’s shape after installation and during use. A low, wrinkled area, repeated flapping or standing rainwater can point to poor tension, an inadequate slope, or both.
- Inspect the sail from below and along each edge. Sagging fabric that forms a hollow can collect rainwater, while flapping edges show that the sail is moving rather than sitting evenly under tension. Note which corner or side looks loose before adjusting the turnbuckles. This helps you make a measured correction instead of tightening blindly.
- Set the sail at a slope of at least 20 degrees to help prevent pooling. The high and low corners should have a height difference of at least 30 cm, giving water a clear route off the fabric. Consider the slope during installation, because tightening alone cannot correct a sail that sits too flat.
- Allow runoff by placing one attachment point 20 to 30 cm lower than the others. For a triangle, the lower point creates a direction for water to drain; for a square or rectangle, plan the high and low corners so water does not settle in the centre. Check that the lower edge has a clear path, rather than draining onto a doorway or seating area.
- After changing the slope, tighten the turnbuckles gradually and check the fabric again. A properly tensioned sail should look taut and smooth, without wrinkles or a deep dip in the centre. If one corner is pulled too far, ease its fitting and balance the tension across the other attachment points, then check that rainwater can drain.
- Observe the sail during rain, then review its shape once the fabric has dried. If water still pools despite a clear slope and balanced tension, the sail’s layout may not suit the fixing points. For a tailored replacement, explore a bespoke sail shade designed around the outdoor space and its attachment positions.
A shade sail should have at least 25% angling to help rainwater flow off. A triangular shade sail can be arranged with 1 or 2 low points while allowing for runoff.
Sail Shades Direct: Rolling Sun Sails
Sail Shades Direct can help when recurring sagging, damaged fabric or unsuitable fixing positions mean adjustment alone won’t solve the problem. For a new outdoor layout, Bespoke Sail Shades can be tailored to the space, while Rolling Sun Sails offer another shade option. Arm Awnings and Giant Umbrellas can suit areas where a fixed sail isn’t the right fit.
Consider replacing the sail if tears or weakened stitching make retensioning unsuitable, or if its shape cannot provide the slope needed for drainage. The right option depends on the space, the shade you need and how you plan to use the installation.
For help considering a suitable shade solution, contact Sail Shades Direct.
Plan the next step for your outdoor space
Knowing how to retension a shade sail gives you a useful starting point, but recurring problems may mean it’s time to rethink the setup. Consider how you use the area throughout the day, where you need shade and whether the existing fixing positions suit your needs. These priorities can guide a more considered choice instead of repeating an adjustment that hasn’t solved the problem.
If the fabric or fittings are damaged, or the sail’s layout doesn’t suit the space, take those details into account before planning a replacement. For homeowners considering a broader garden renovation alongside shade structures, comprehensive landscape and construction services like azgreenearth.com show how practical shading can be incorporated into overall outdoor living layouts. A clear idea of the area and the shade you want makes it easier to discuss a practical solution for your outdoor space.
For help exploring what could suit your space, contact Sail Shades Direct. A well-planned shade solution can make your outdoor area more comfortable and useful.
Frequently Asked Questions
How tight should a shade sail be when tensioned?
A shade sail should be taut and smooth, without wrinkles, with even tension across its attachment points. Don’t pull it so hard that the fabric, seams or corner fittings are strained. After adjustment, view it from below and along each edge. Aim for a flat, stable profile; a pronounced dip in the centre or tight creases mean the tension needs reassessing.
How to fix a sagging or flapping shade sail?
First work out whether the looseness is limited to one corner or runs along an edge. Make small turnbuckle adjustments at opposing corners, then reassess the whole sail rather than pulling one point tight. If the fabric still bows after you balance the tension, consider whether the fixing layout is causing the dip. More tension alone won’t correct an unsuitable slope or a damaged seam.
How to retension a shade sail safely without damaging it?
Inspect the fabric, seams and fittings before applying force, then make gradual, balanced adjustments. Stop if a tear opens or a fixing shifts, and don’t use extra force to compensate for damaged material. Keep clear of the area beneath the sail while adjusting. Remove the sail during snowfall or prolonged rain, and during storms at wind force 7 or higher.